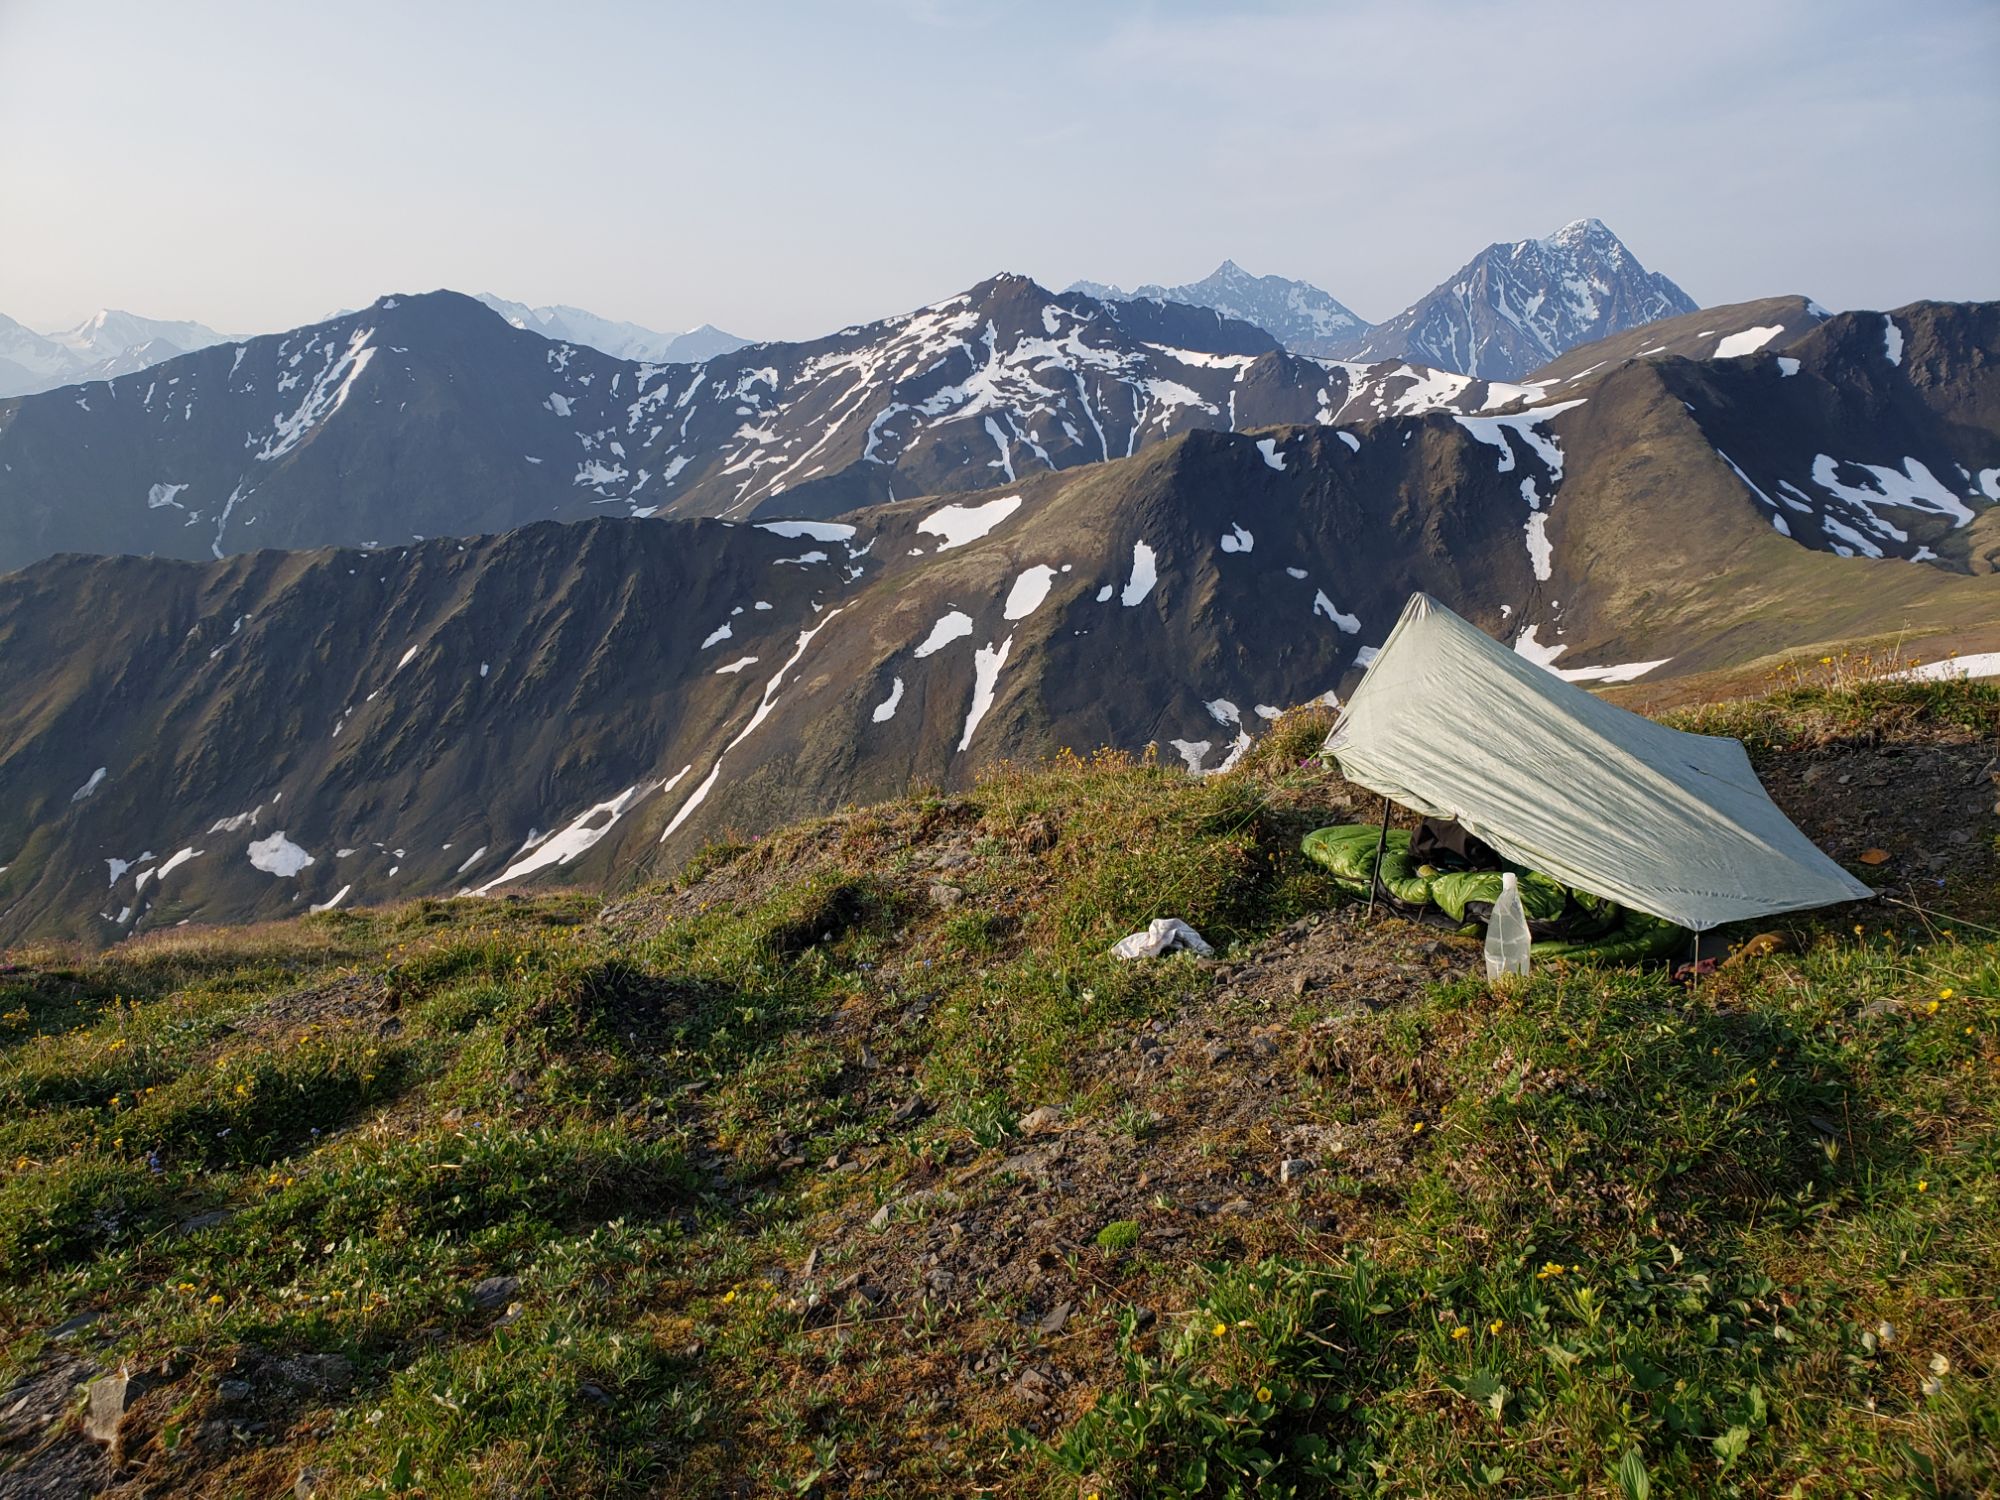
For the last four years I’ve been working on a route in the Chugach (pronounced chew-gash) mountains outside Anchorage, Alaska. Here it is at last, for public consumption- maybe you want to hike it?! (All photos are from the route.)
The Chugach Crowberry Traverse
Pioneer Ridge Trailhead to Bird Ridge Trailhead/Knik River to Turnagain Arm, Chugach Mountains, Alaska
77 Miles
29,925 feet of elevation gain
388 feet of elevation change per mile
The map for this route is here.

.

Endless alpine tundra! Trails built by sheep! Ridgewalking for miles! The floor is berries! No packraft required. Very little bushwhacking. Close to Anchorage (a major airport). What could be better?
If you like steep climbs, wide open landscapes, apex predators and the smell of Labrador tea, if vert and tundra naps are the things that make your life worth living, the Chugach Crowberry Traverse might be for you!

I made this route using a combination of trip reports I found online, old maps, the advice of friends who know the area, the slope angle shading layer of caltopo, the public tracks layer on gaia, and my own exploration on foot. I’ve hiked all parts of the route at least twice (and some parts four times). This route is on Dena’ina land. They are the original holders of all of this knowledge; which passes go, the best valleys for walking, etc.

I like hiking this route southbound, so that’s the way the miles on the map are set up. You can hike it the other way if you want, I don’t see any reason why not.
Best time of year to hike: July. Possibly as early as mid June, if enough of the snow on the ridges is gone, and possibly August if you can get a clear weather window (August is a fall month in Alaska, unfortunately, so that’s when the Cold Rains of Autumn often begin- I would not do this hike if the forecast calls for rain every day, it’s cold on the ridges when it’s raining [aka hypothermia edgeplay] and also visibility is important for navigation). As far as waiting for the snow to recede in June, you can use the Sentinal Weekly satellite layer on caltopo to check current snow levels (it’s updated weekly).

What temperature range can I expect in these mountains in summer? Nights can freeze, during the day it’s usually at least partly cloudy and no hotter than 65 degrees, occasionally it gets up to 70 (that’s considered a heat wave). If it rains during the day the temperature can plummet to 40 degrees.
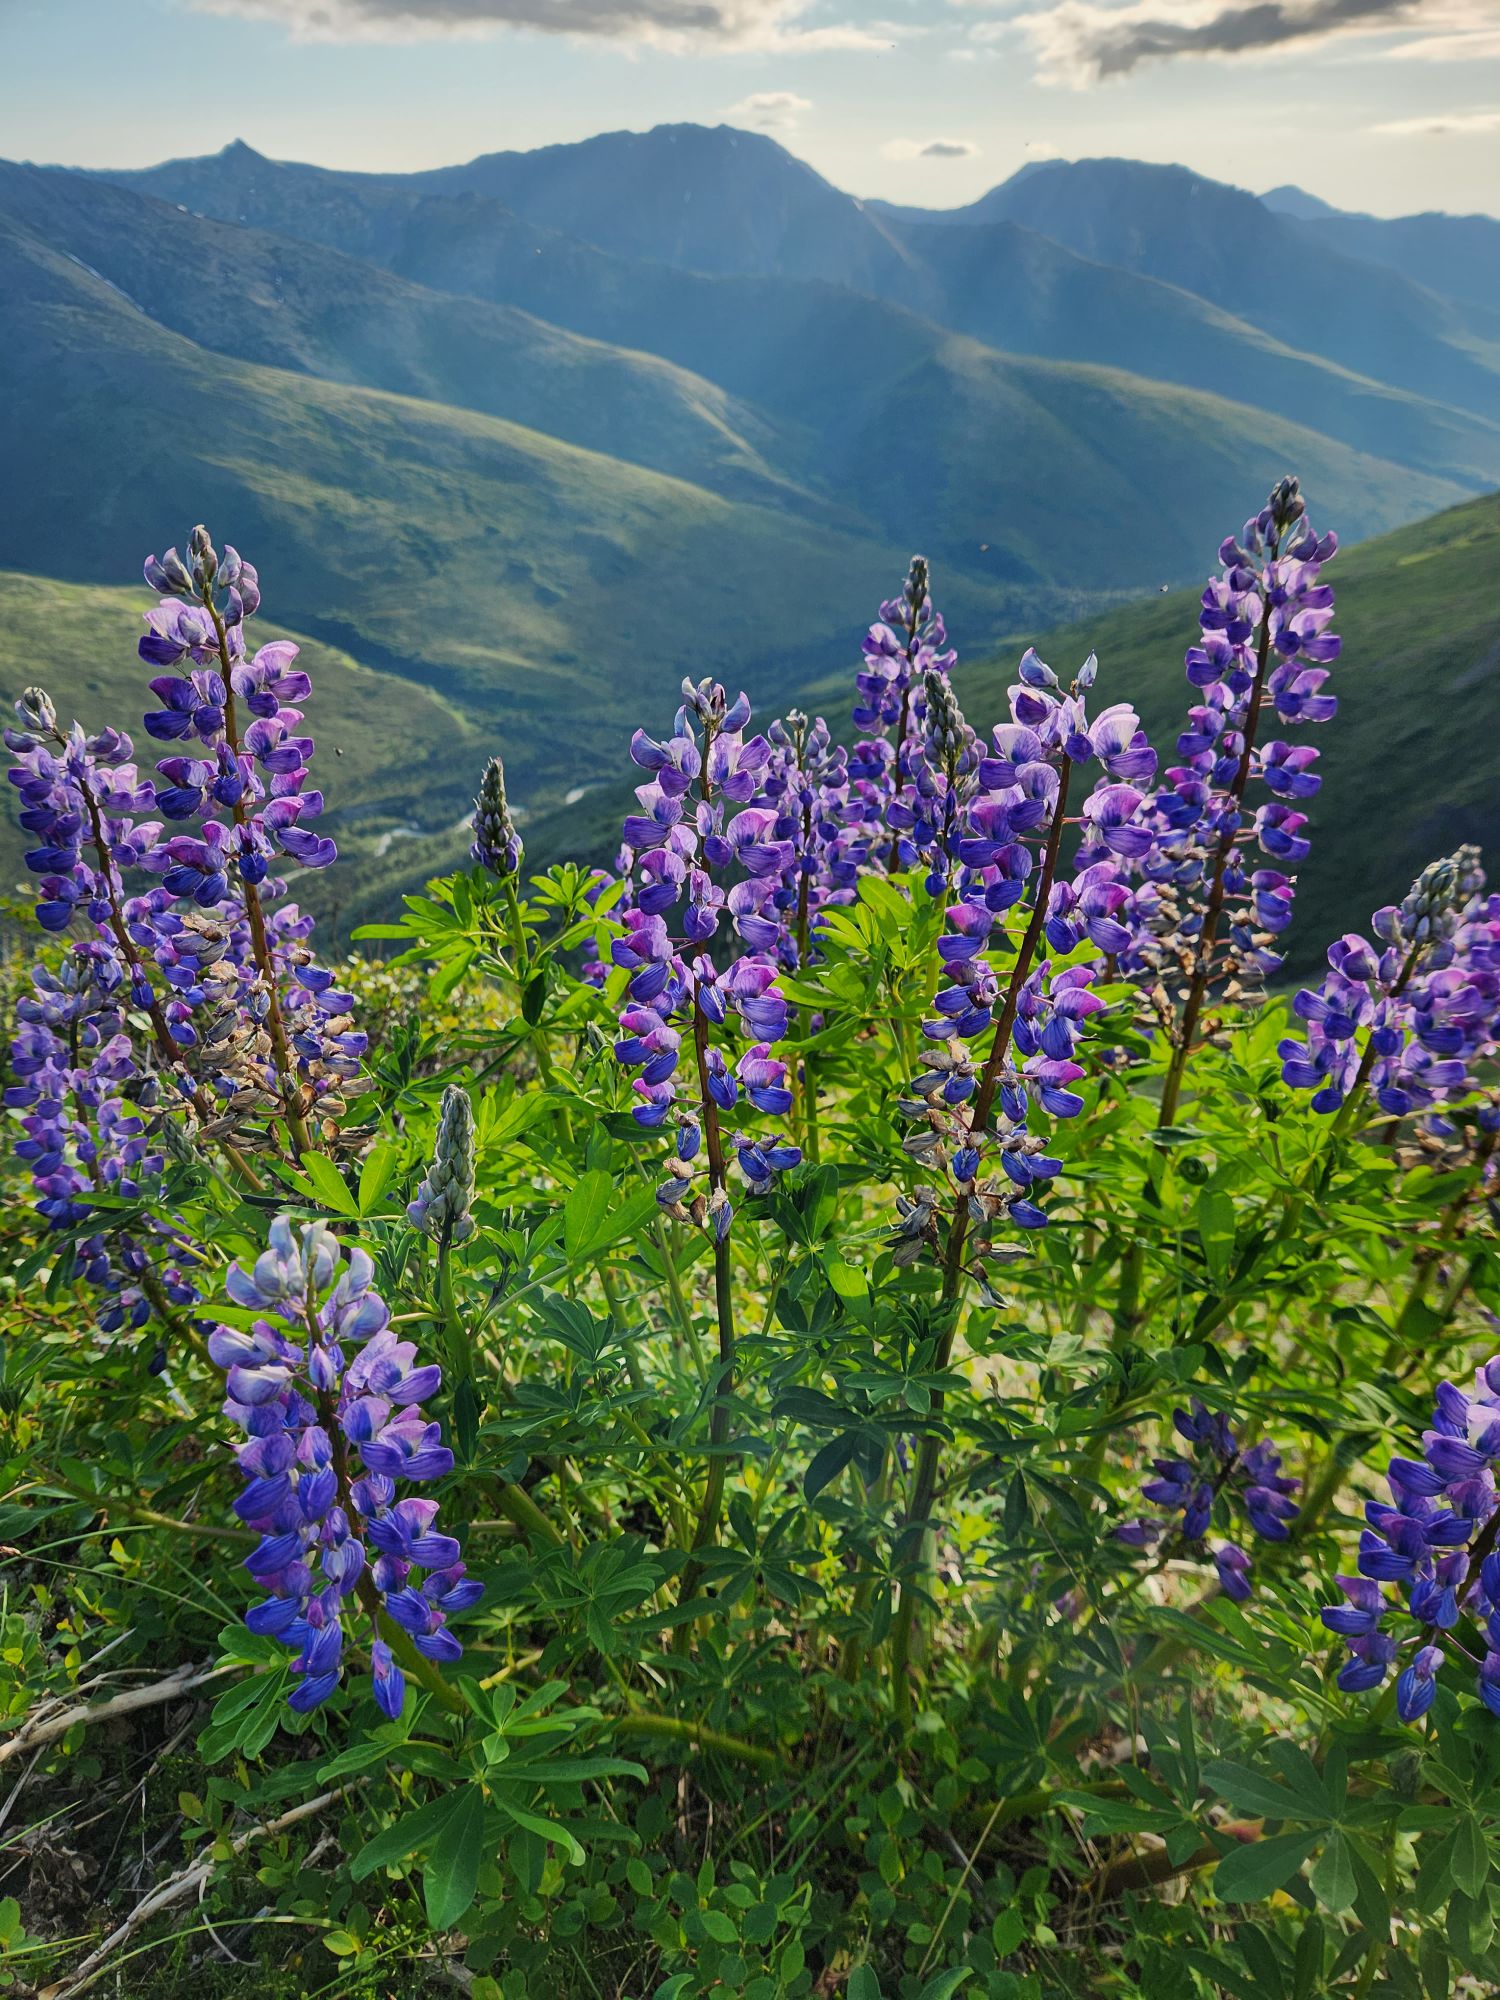
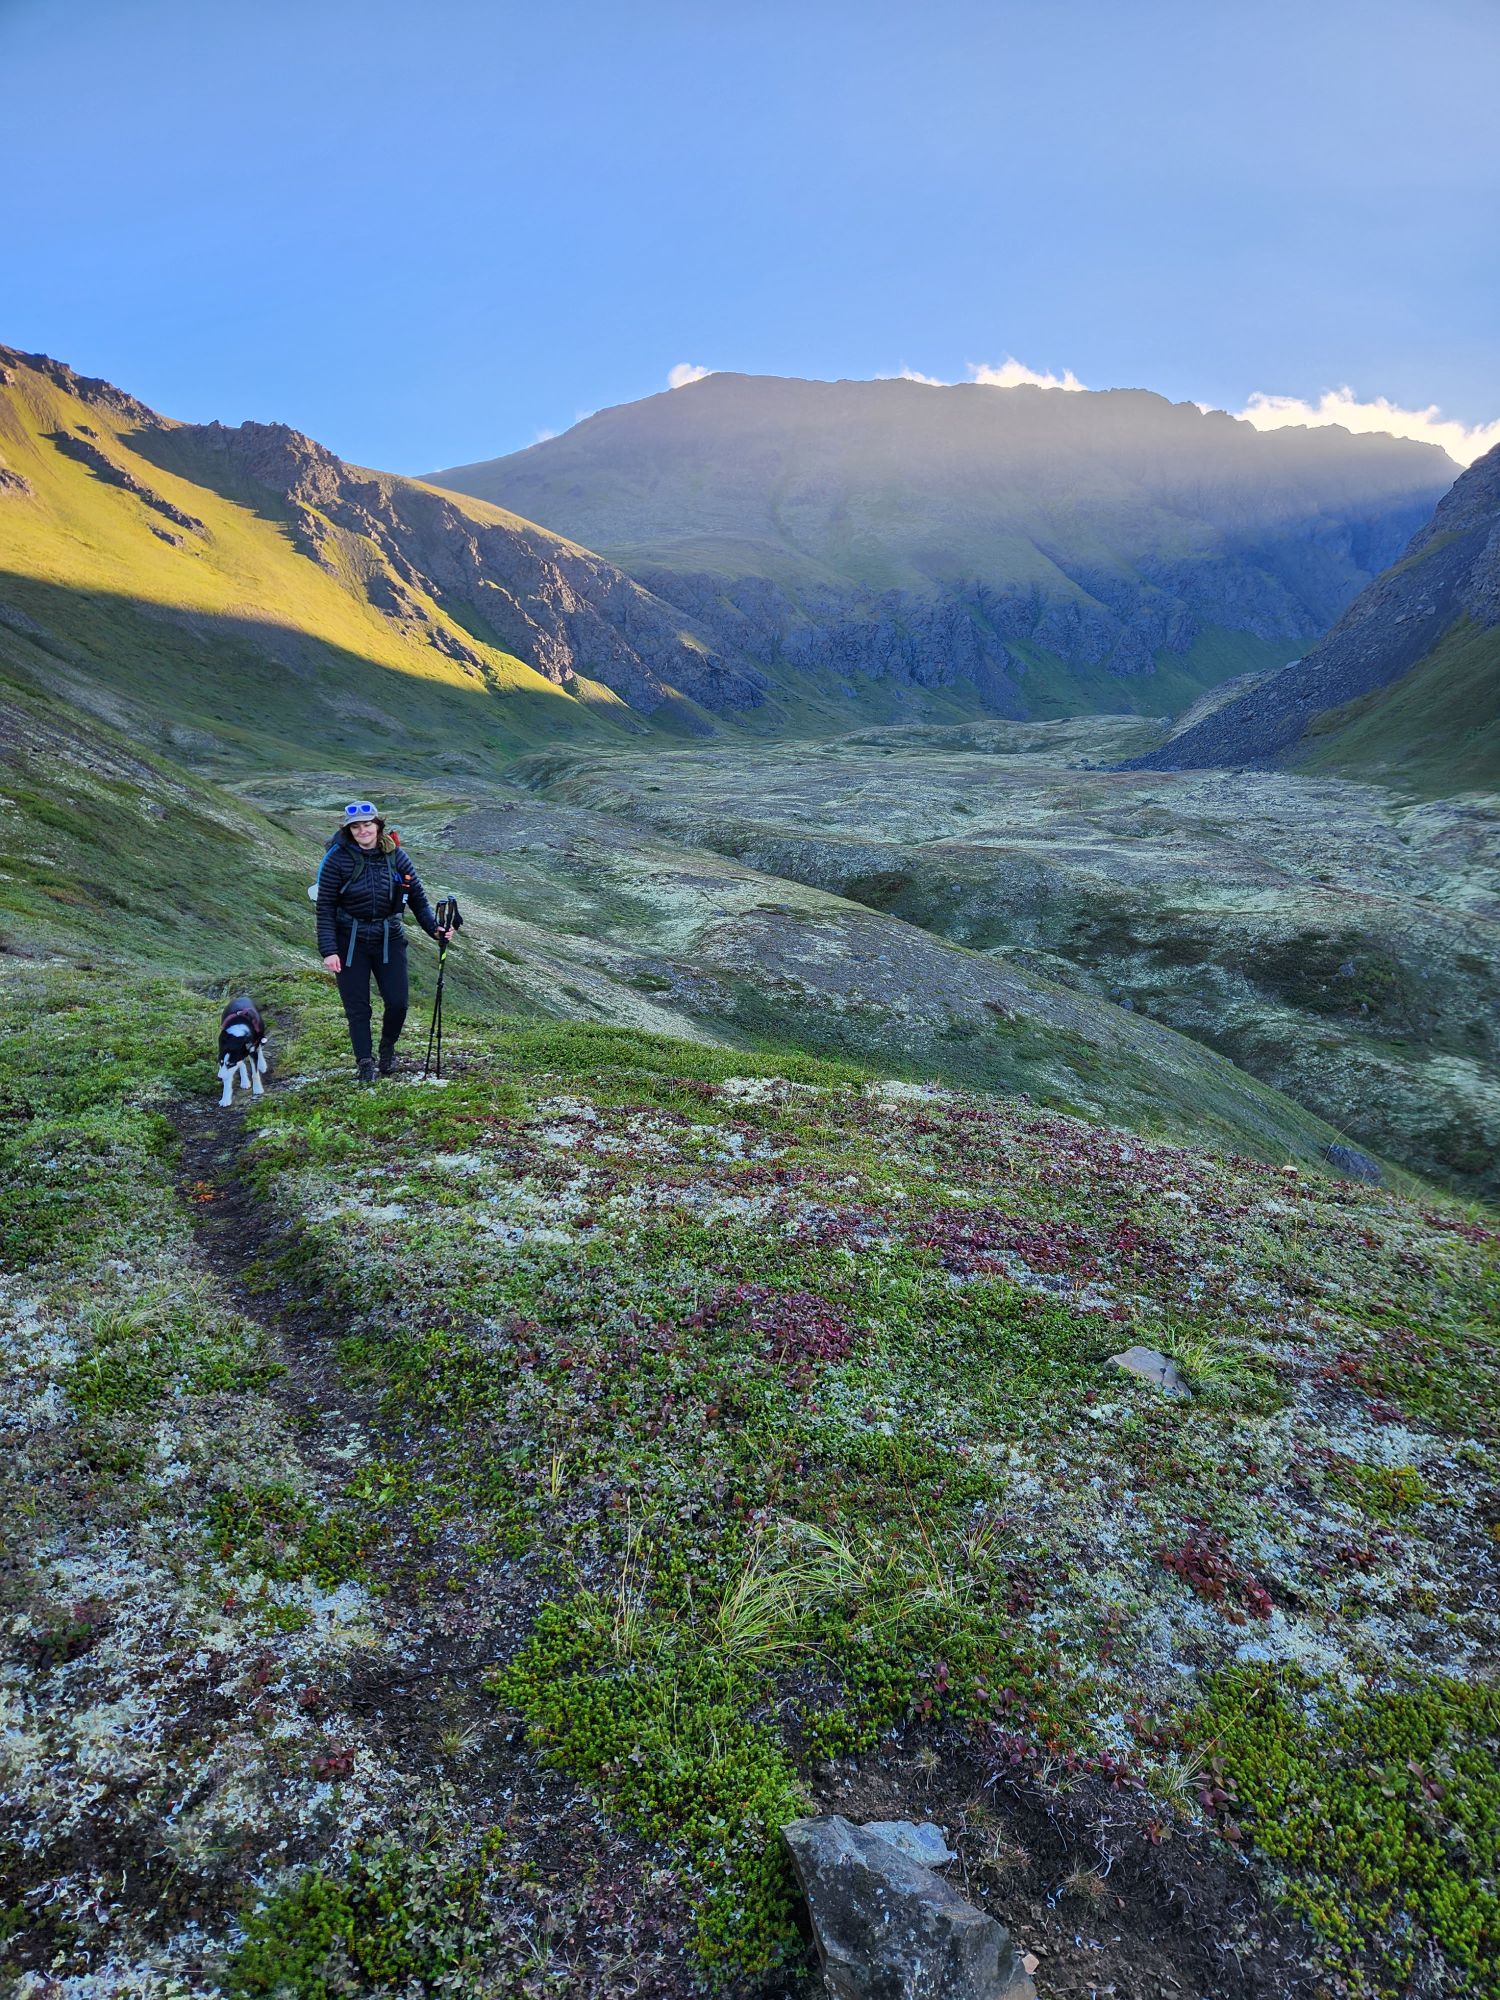
What’s the walking like? Above treeline (like 2,000 feet?) the walking is generally very good, if also very steep. It’s a mix of scree, crispy tundra, and softer tundra (lowbush blueberries, crowberries, etc.) To get above treeline the route uses built trails and use trails, so you don’t have to flail through jungle gyms of alder.
The best walking on the whole route is reindeer lichen! When you’re climbing a slope and you see a patch of this whitish lichen- go towards it! It’s so crispy and wonderful. It looks like this:

Daily mileage: I’m an exactly average long-distance hiker- I’ve completed every long-distance hike I’ve ever done at the average pace (the PCT in 5 months, which is the average time it takes to do that hike, the CDT in 5 months, the Hayduke in 2 months, the AZT in 6 weeks, etc). 10 miles a day is the most I can do on the Crowberry Traverse without feeling like my achilles is going to snap. The Chugach mountains are steep– for example, the first nine miles of this route (headed south) has 7,400 feet of elevation gain! That being said, if you’ve hiked any of the long trails I have but at a faster pace (or if you’re an ultra runner), you might enjoy doing more miles than me each day. If you’ve hiked the trails I have but at a slower pace, you might enjoy fewer miles.

Navigation: Most of this route is cross-country. You’ll be above treeline much of the time, though, in the alpine tundra where views are endless and navigating is a simple joy. As long as you download the route to your caltopo app as well as the background maps (I’ll tell you how to do this at the bottom of this page) and have a way to keep your phone charged, you shouldn’t have a problem. (I do not recommend using the Gaia app for this hike. The slope-angle shading layer in the Caltopo app is really useful should you need to bail off a ridge due to weather- while the Gaia app does have a slope-angle shading layer of sorts, it’s subpar and not actually usable, in my opinion.) You can also print paper maps (instructions at the bottom). You can screenshot these notes to have them as well.

Resupply: There are two potential resupply spots on this route-
- Eklutna Lake, at mile 18. There’s a campground with bearboxes, water and pit toilets. You could have someone drive in a resupply and meet you. There is no cell reception.
- Eagle River Nature Center, at mile 39.5. Another spot a friend could meet you with a resupply. There are picnic tables, water and pit toilets, and there is a designated camping area (with space for tons of tents) with bearboxes just a little ways up the Crow Pass Trail. The campground must be reserved in advance online. There’s no cell reception at Eagle River Nature Center.

Bailing: both these resupply spots are good places to get a ride back to town, if you need to. There’s a good amount of traffic and you could hitch. I also added side trails that you can use to bail if needed.

Water: all of the blue lines on the base map have water, except for when they’re close to the ridges- the ridges are completely dry, with the occasional snowpatch. I’ve made waypoints for two snowpatches that are (usually) there on Pioneer ridge, in the first 12 miles. If these are gone, you might have to leave this ridge to find water (the lower blue lines, in the drainages, will have it).
Exposure: There’s nowhere on this route where you could easily fall to your death, but there are many places where you could break a leg if you don’t step carefully. Several of the passes are steep, loose scree and rock, and there are many sheep trails that contour along high, steep slopes. If you like cross-country routes with some exposure like the Sierra High Route, the Kings Canyon High Basin Route, the Wind River High Route or the Hayduke, then you’ll feel comfortable on this route. If that level of exposure ruins the fun for you, then you might not like this route.
Bushwhacking: I did a damn good job of keeping the alders to a minimum on this route (pats self on back). There is brush on occasion, but nothing soul-crushing- the last bit of the descent down to Peter’s creek around mile 27 is brushy forest and a bit slow but not overly demoralizing. The Crow Pass trail some miles after leaving Eagle River Nature Center is reliably brushy and overgrown- while there is a built trail that you can feel with your feet, you’ll be walking through head-high grass and nettles- but there’s not much to be done about that. The north fork of the Ship Creek Valley (which starts at mile 60) has potential for bad brush if you don’t stay high on the south side, but if you do it’s chill.

Reception: most of the ridges have cell reception. None of the drainages do.
Water crossings: Even at normal levels, it’s important to know safe river crossing techniques to cross Peter’s Creek (mile 29.3) and the Eagle River (just before mile 51). Thunderbird creek at mile 21.5 can sometimes also be a bit high. This is the best crossing technique– everyone faces upstream in a line with the tallest person in front. The front person leans forwards on their poles and the person behind them holds their pack and leans forward onto them, pushing them forward onto the weight of their poles. The person in back places their feet behind the front person’s feet, and steps with them, always keeping their feet behind theirs. This way, the force of the back person’s lean stabilizes the front person on their poles, and the wake of the front person’s legs breaks the force of the river for the back person. The front person calls out each time they take a step, so that the back person can stay in their wake and step with them. The video does a good job of emphasizing the lean, and you can see what a deep river this group is able to cross with this technique. If you don’t already know this technique, please practice before you go. I’ve marked a good spot to cross Peter’s Creek on the map, where there are two braids in the river. If the Eagle River is too high when you get to it, you can camp and cross in the morning when it’s lower. There are usually lots of people on that trail (the Crow Pass trail) to tell you how the crossing is, and they should know at Eagle River Nature Center (mile 39.5) as well. In early season, both rivers may be too high to cross. If so, you can bail on the Peter’s Creek trail (marked on the map) or on the road to the Eagle River Nature Center.
Bears: There are many grizzlies in the Chugach Mountains, as well as black bears. Grizzlies are not dangerous at a distance when you’re above treeline- you can give them a wide berth, and they’ll almost always run away once they realize that you’re human. Luckily, much of this route is above treeline, but there are times when it’s in the trees or in brush. If you surprise a grizzly at close range, they can think you’re challenging them to a fight, and can charge you. The black bears can be dangerous in close quarters if they have cubs with them. When you’re in the trees or brush on this route it’s important to make lots of noise and keep your bearspray super handy. The question I ask myself is- “could I access my bearspray is one second?” I keep mine in a holder on the hipbelt of my pack (when I’m running I hold it in my hand). If a grizzly comes towards you, hold your ground and talk to it loudly. Usually the bear is just trying to figure out what you are, and will turn and run once it smells you (this has happened to me a couple times). If a grizzly attacks you, curl up like a shrimp and play dead. If a black bear attacks you, fight back. For food protection I carry an ursack, and at night I put it away from my tent. Although bears are a real danger, the number of attacks in this area vs. the number of people recreating is super low, meaning that it’s highly statistically unlikely you’ll be attacked (you probably will see a bear at a distance though. Or five or six…)

Falling Water Valley Access: Falling Water Valley (mile 33)(adjacent to Ram Valley, which you may have already heard of if you live in this area) is commonly accessed from the neighborhood to the south. The people in that neighborhood decided they didn’t like the traffic of people hiking to these valleys, and they declared the access trail, which is an easement through private land, to be closed. This is currently a hotly contested issue which will hopefully be resolved soon. The CCT accesses Falling Water Valley from the north, from Peter’s Creek. That being said, you still have to walk out of Falling Water Valley via the currently contested easement trail, to continue on the route south. If you’re just walking out, and not parking your vehicle in that neighborhood, it might be a non-issue- I’m not sure. I recommend doing your own research ahead of your hike, because the details are changing all the time.

How to use the map: There’s a line for the main route and several lines for alternate exit/entrance routes. To see an elevation profile, click the line and then click “profile”. Along the way, there are waypoints with extra info- click on these waypoints to read the info. For background layers, I use either the “scanned topos” (USGS topos) or “mapbuilder topo” layers in caltopo. I recommend downloading both of these background layers onto the app for your hike, because they both have good information. I also use the slope angle shading layer- this is clutch for finding passes, climbs and descents that go, if you plan to leave the route at all. With slope angle shading, the different colors denote the angle of the slope. In general, white and yellow are chill for walking (not necessarily flat, but not steep enough to be sketchy), orange is more steep, red should be avoided unless you know for sure that it goes, and purple should be avoided always. While you’re on the route it’s fun to compare what you see/what you’re walking on to the colors on slope angle shading- this will help you get a feel for how the colors correspond to your actual experience of walking.

How to download the map to the caltopo app on your phone, for navigation while in airplane mode:
(I do not recommend using the Gaia app for this hike. The slope-angle shading layer in the Caltopo app is really useful should you need to bail off a ridge due to weather- while the Gaia app does have a slope-angle shading layer of sorts, it’s subpar and not actually usable, in my opinion.)
-You’ll need to download the caltopo app to your phone, buy the paid version, create a caltopo account and log into the app on your phone.
-Open the page you’re reading right now on your phone’s internet browser, and tap this link: https://caltopo.com/m/12GR .
-If you’re logged in to your caltopo app, the link should open the map on your caltopo app. If the map doesn’t open in your caltopo app, make sure you’ve completed the first step.
-Once you have the map open in the caltopo app, click the hamburger in the upper left-hand corner:

-Select “download layers”

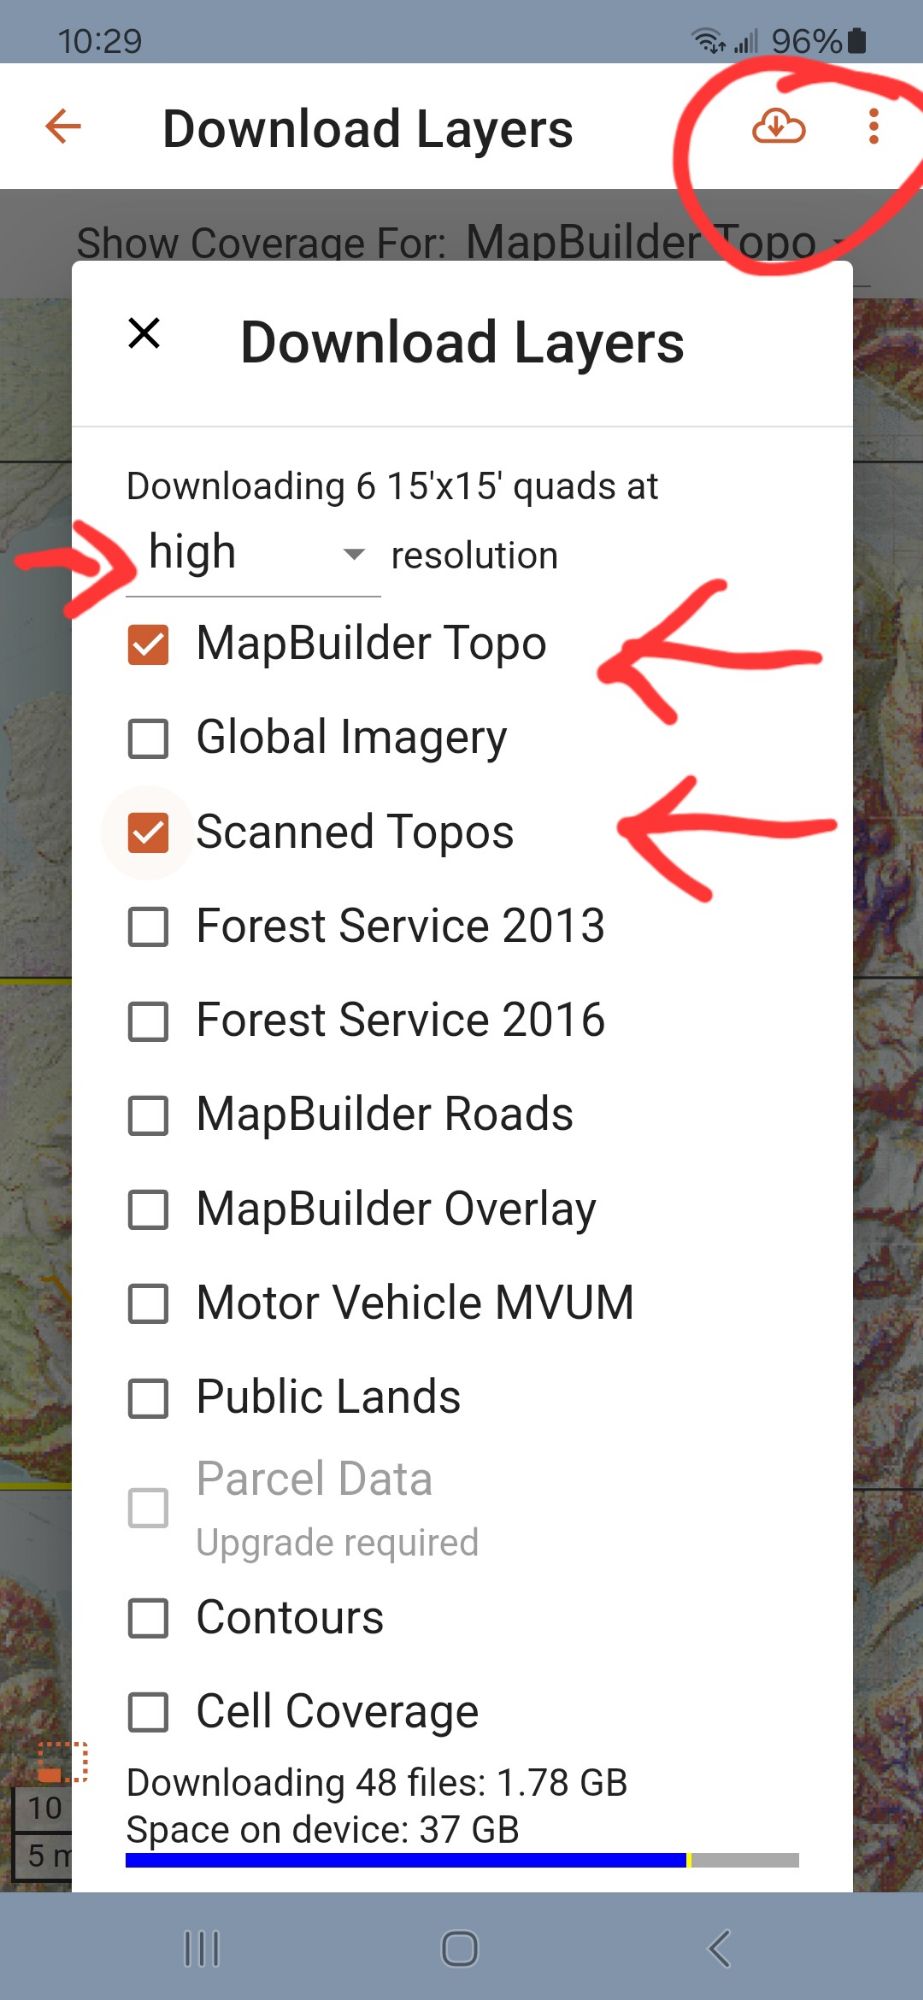
-The app will place yellow boxes where it thinks you need coverage. If parts of the route are outside the yellow boxes, tap those quadrants to create a yellow box, and un-select yellow boxes for areas that you don’t need. Click the “download” icon in the upper right corner.

-Select MapBuilder Topo and Scanned Topos (so you have both, although just one is fine if you’re trying to save space), select “high” resolution, scroll down and click “download”.
-Once your maps have finished downloading, you can put your phone in airplane mode and zoom in to make sure the finer details of the maps are there. You can switch between “scanned topos” and “mapbuilder topo” by tapping the layers icon in the upper right hand corner of the screen.
You can also print maps of this route from caltopo on desktop. Open the map on your computer browser- https://caltopo.com/m/12GR
-Use the menu on the right to choose the background layers you want for your printed maps. For this route, I would choose “scanned topos”, shaded relief at 30%, and slope angle shading. When you’re ready, click the little printer icon (circled in red)

-This will open the map in a separate window, and give you this red box. Use the dot in the middle of the box to move it, and the corners to make it smaller or larger. Drag the box over a small section of the start of the route, and then use “add page” (circled in red) to add another red box, and place that over another small section of the route. You can also switch between portrait and landscape orientation.

-Keep adding boxes until all the route is covered. Now your map looks like this (you probably need more boxes, covering smaller areas, than this to have good detail on your map, but this is just an example):

-When you’re satisfied with your boxes, click “generate PDF” on the lower left side of the screen, and caltopo will produce a beautiful PDF for you to download and print:

If you have any questions about this hike you can email me at carrotquinn4@gmail.com . If you do the hike and want to send me beta, please do! And have fun out there in the crowberry!!

You must be logged in to post a comment.